
I finished Peri’s outfit! I am both pleased and surprised with how quickly it came together. Knitting this outfit went infinitely smoother than knitting the practice pants for Ken. I was able to cast on properly on the first try, and I was able to knit even rows. It looks much more polished than my previous attempt. Plus it took less time than crochet outfits. I couldn’t be happier with how it turned out.
I mashed together two patterns from Sticka till Barbie and one pattern of my own to create this outfit. I did the shorts and belt from pattern number 96 (gray green jumpsuit) and the top from pattern number 62 (two color glitter dress). Then I went back in and crocheted the arms from my Peacoat Pattern into the appropriate area, stopping a few rows early because Peri’s blouse has shorter sleeves than my coat (I go into more detail on the sleeves below).
I used my size US 1 (2-1/4 mm) knitting needles and size 10 crochet thread to create the body of the outfit. Casting on and knitting this pattern was a breeze. The belt was trickier. I did a slip stitch pearl-wise incorrectly. I did the pearl motion, but I forgot to move the thread behind the stitch – this caused the working end of the yarn to be in front of a stitches for the belt loops. I had to unravel three rows of knitting to correct my mistake. Otherwise, I didn’t make any other big mistakes while making this.
Another knitting lesson I learned with this item is that I have been doing a knit two together (k2tog) stitch wrong. I was looking at a YouTube video when I realized that I was orienting the loops on the hook the wrong way. It isn’t a big deal, but I find it funny. I don’t think it makes much of a difference in the pants or this outfit, luckily. I keep assuming that I know how to do basic knitting techniques, and yet I have been doing it wrong all along. Much of this is because I learned to knit from books and YouTube videos. I have never had another knitter sit with me and show me how to do things. My mother taught me to crochet, and she was always there to correct me when I did things the wrong way. I never had that coddling with knitting, so I make mistakes when my hubris gets the best of me.
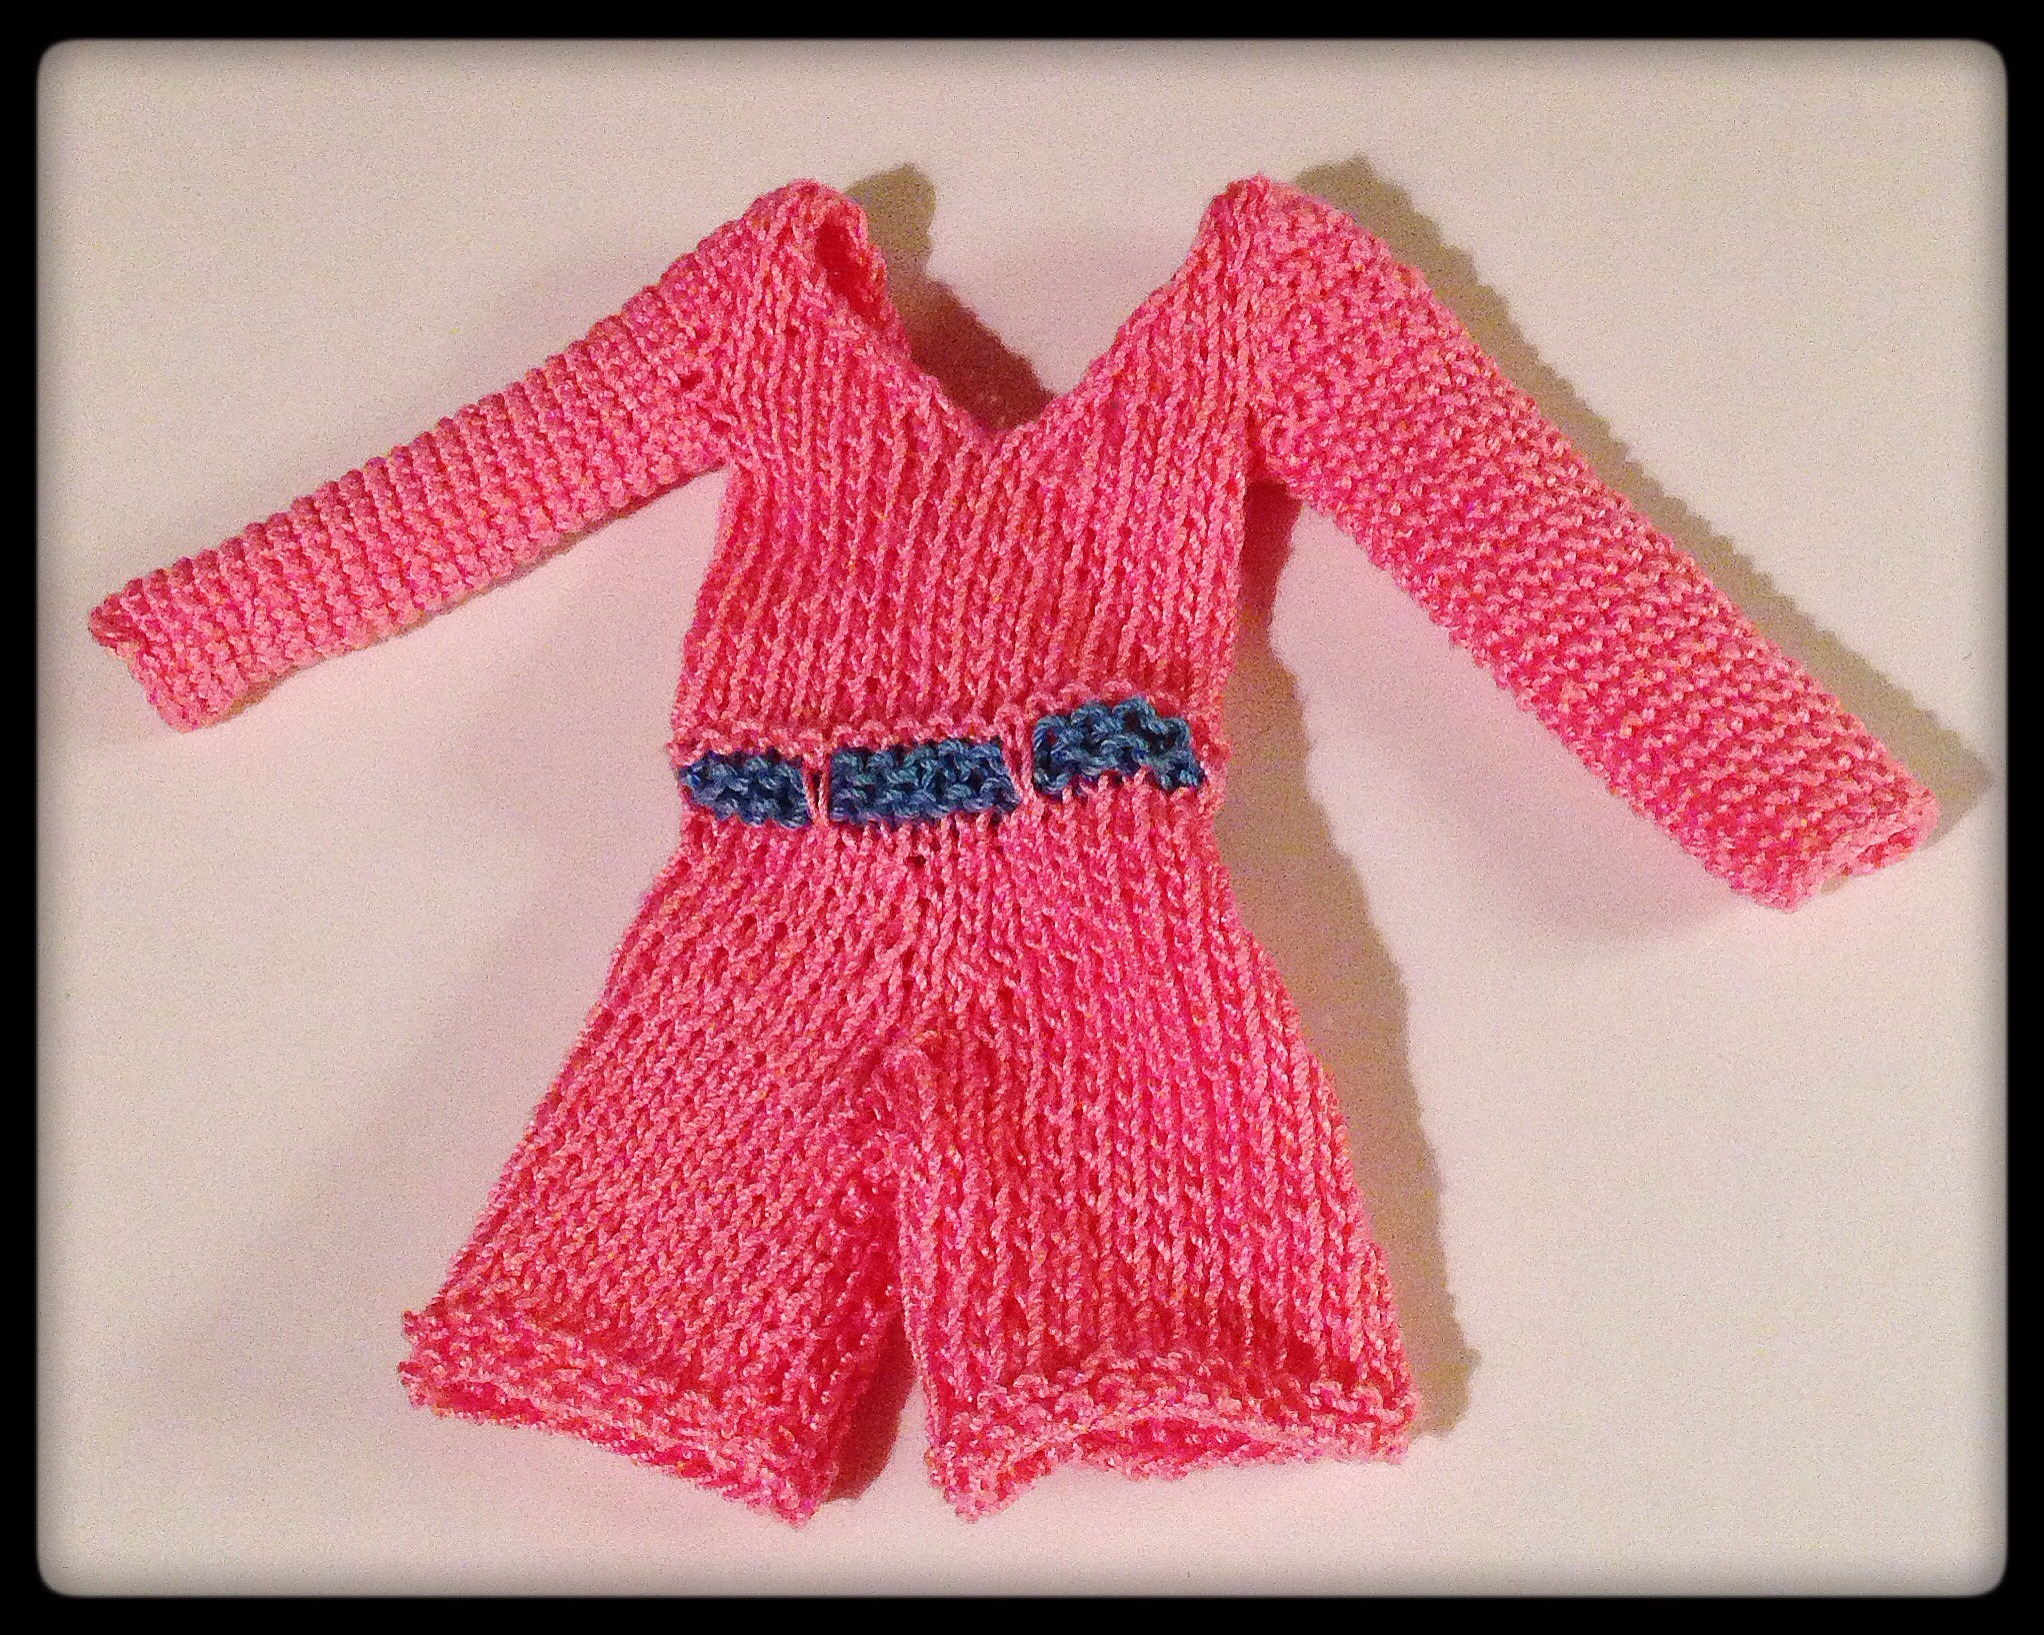
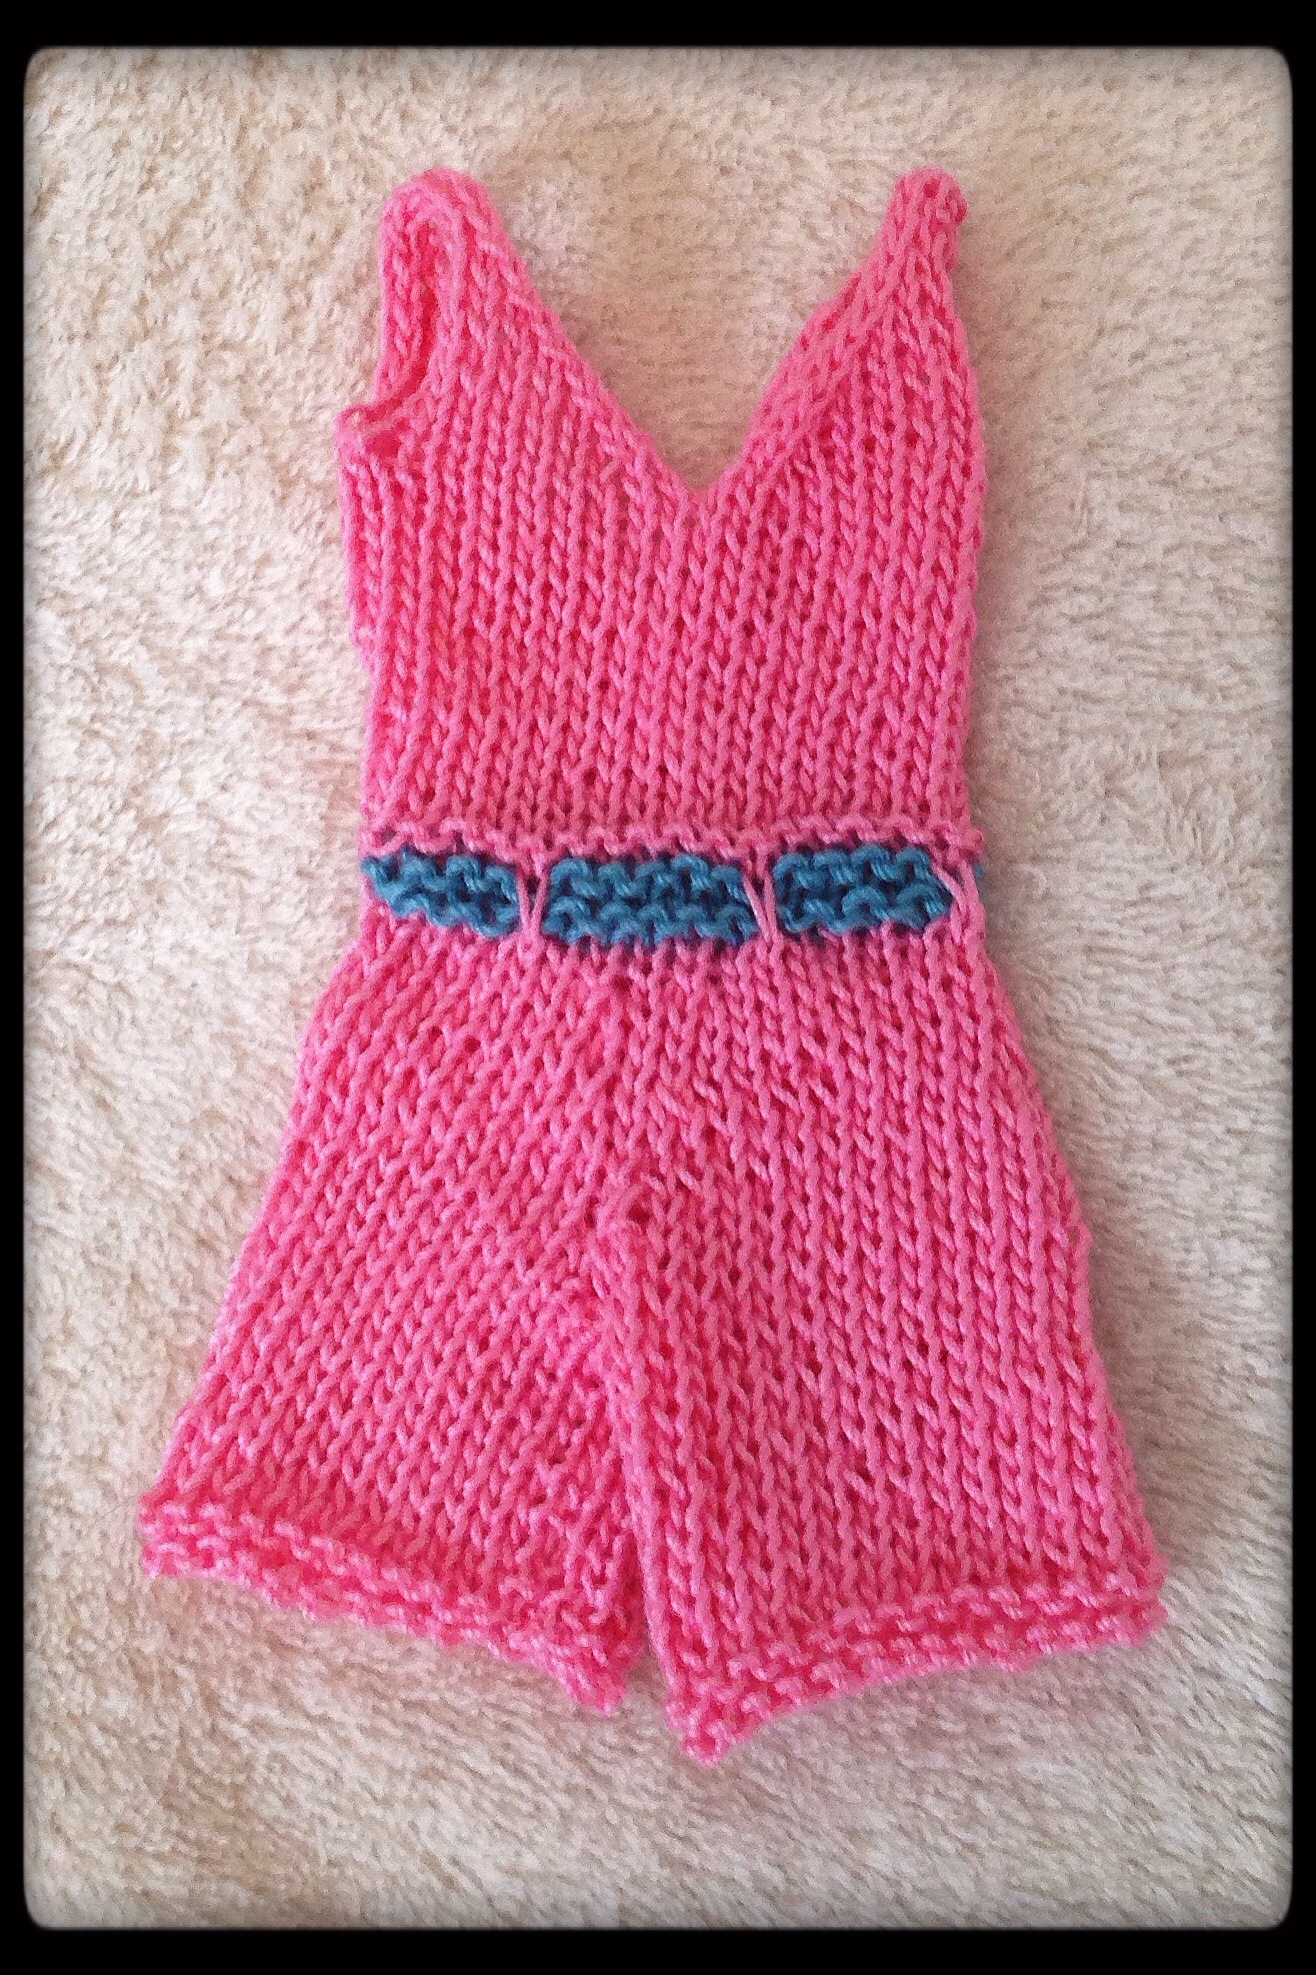
The top was a bit trickier because the pattern has a misprint. It says to k2tog when you should ssk (slip slip knit). You want the decreases in each side of the neck opening to complement the side it is moving, and if you follow the pattern exactly it will look weird – just trust me on this. I had to unravel several rows when I realized the sides didn’t match up, and upon examination I remembered that there are left leaning decreases and right leaning decreases. It may have been a while since I’ve knit, but at least I retained that helpful bit of information. This is out the outfit turned out after I finished the knitting portion.
Sewing the body together was very easy and went quickly. Because the knit ribbing gives some stretch, I did not use any snaps, hooks, or buttons on the outfit. At first I was afraid that it was too small for the doll, but the knit stitches give it enough stretch that it fits her body perfectly. It slips on and off of the doll quite easily, even if the yarn does somewhat stick to the legs. Once sewn together, I took a break from this piece for a few days. I hurt my wrist after a slip down the stairs, and I just couldn’t pick up a hook.

Once I was better, I crocheted in the arms. I considered a few different ways to do it. Originally, I wanted to knit the arms into the piece, but the process that Sticka till Barbie used for long sleeves was confusing to me. I couldn’t visualize it, so I decided to go with something I am more proficient at. I started by crocheting 5 single crochets to the top of each arm hole. Then, I increased by one single crochet each row until I had 16 total single crochets across the arm hole of the outfit – this gave it the drop down from the shoulder it needs not to have fabric pile up at the shoulder or pull the top in weird ways. From there, I used my sleeve pattern from the Peacoat Pattern, starting at row 2 and stopping at row 23. Peri on the show didn’t have a full length sleeve, and I felt this length was a good approximation of what she wore on the show. From there, I cast off and worked in all the loose ends. It was difficult to do it in the sleeve area because it was so tight, but I managed to get it finished. I had a slight delay because my tapestry needles were misplaced. I’m so sorry! I believe my daughter got ahold of the bag they are kept in and threw it behind the couch. Either that or the cat took his passive-aggressive antics to a whole new level. Either way, they spent a few days behind the couch. Once I found the needles and worked in the loose ends, I tried it on the doll. Thankfully, it fits!
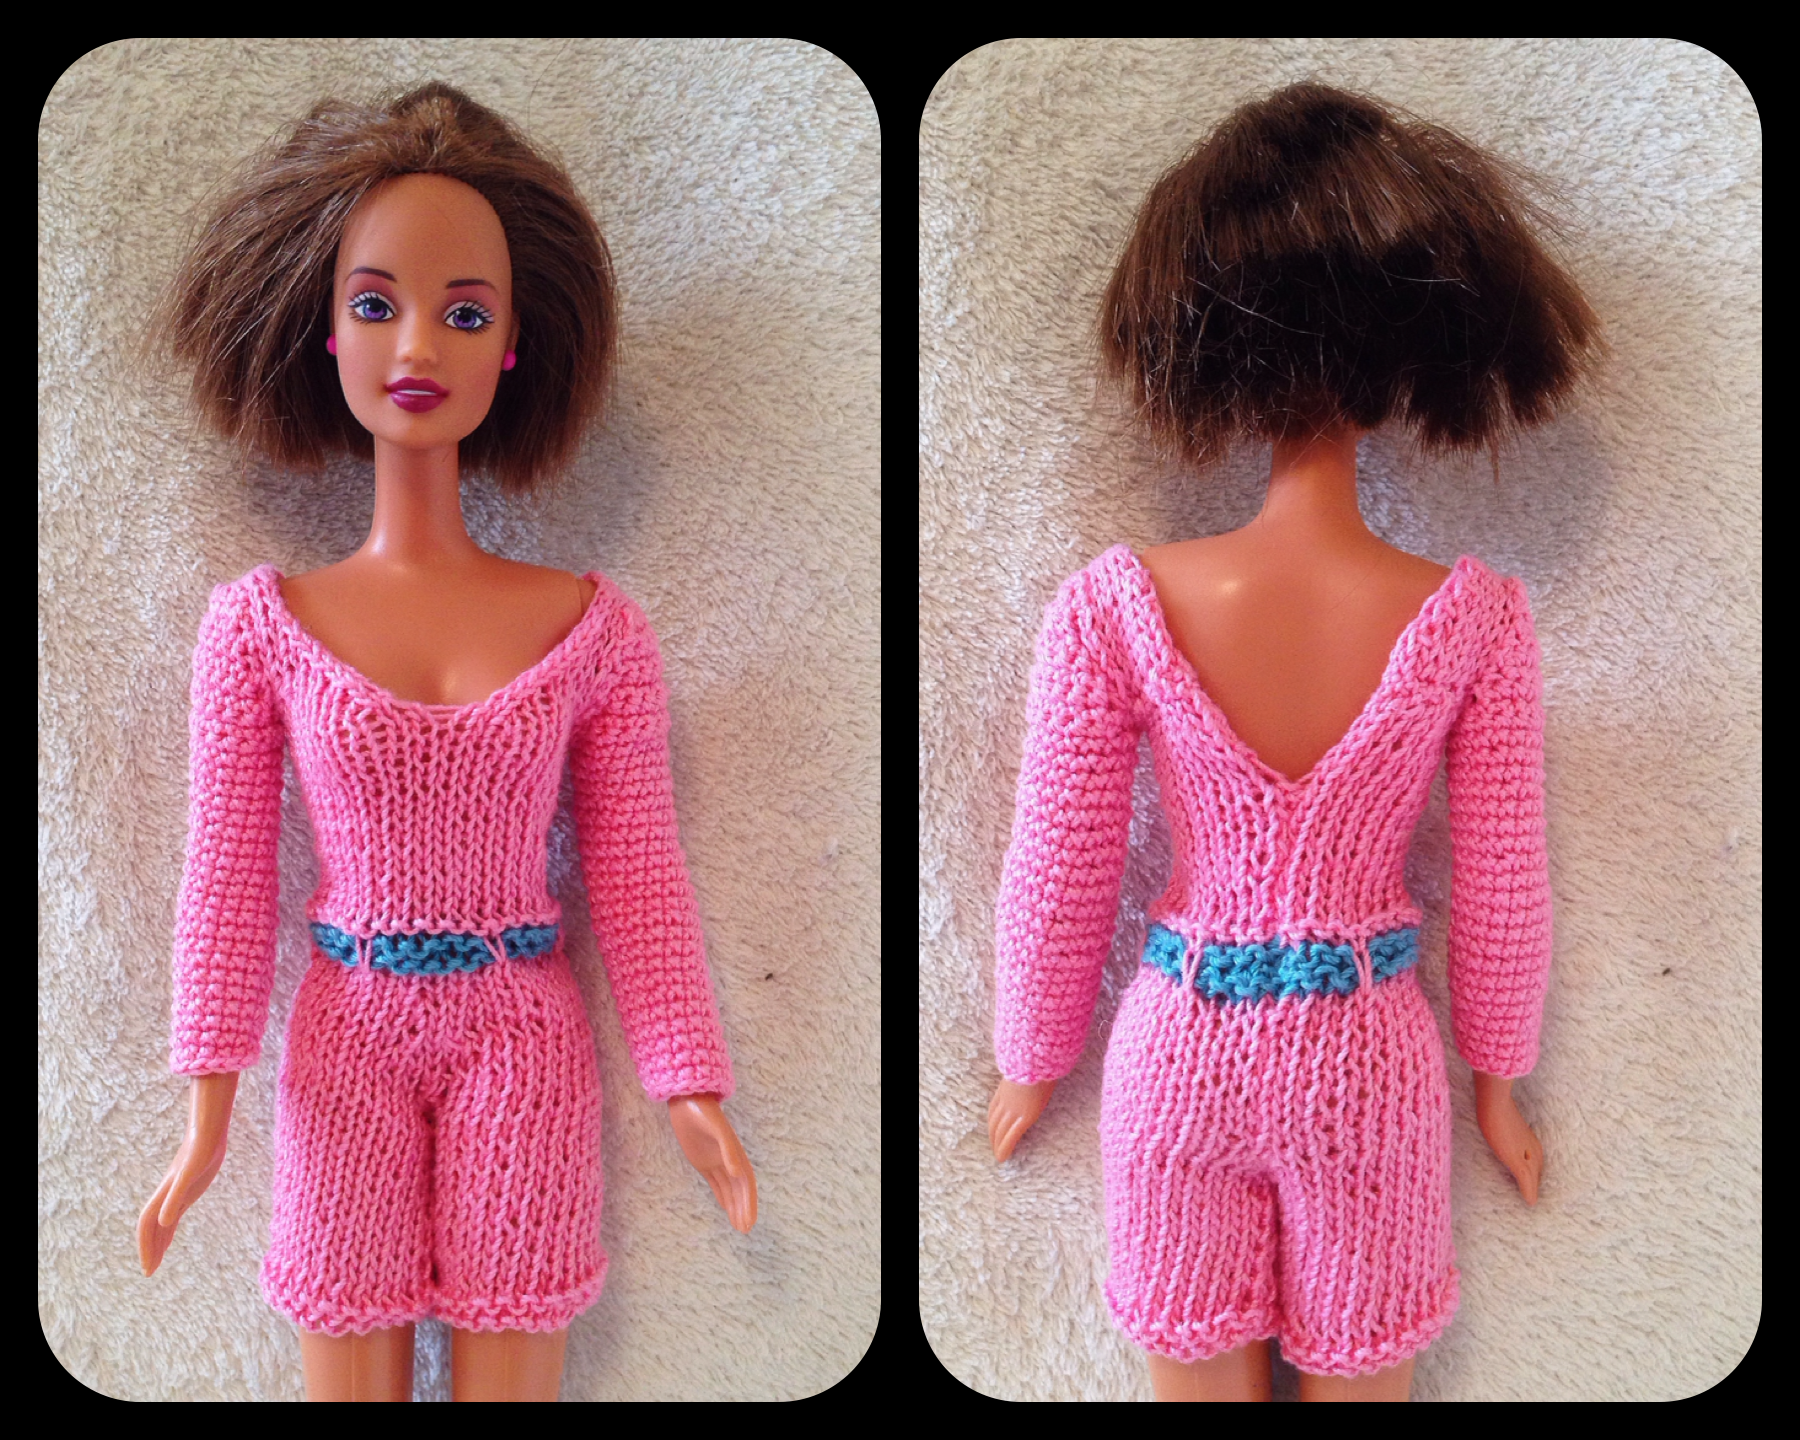
It took me about ten-twelve hours of crafting time to create this outfit from start to finish. It was slow going at times, but I am so pleased with how it looks. The colors and design really came together to create something special. One thing about this pattern that I like is how it is all one piece. I especially like how the belt is built-in. I feel like that makes it much easier to dress her, and it makes her overall outfit much less bulky than if it had been three separate pieces. It also stops the problem of fabric curling that can happen. The tight fit is what I believe stops that problem from manifesting.

I finished the big project for Peri! Horray! I just need to create a few outfit accessories and some props for Peri to complete her entry in the blog. I am excited with how quickly she is coming together! I am also glad that I was able to to find some patterns to frankenstein together instead of having to create my own. I know that creating those patterns for Cofelia really set me back several weeks and caused more headaches than I care to admit. I will keep pushing on this project, so hopefully I will have the next post up in a day or two and have her finished within the next week.
